Mac OS X Localhost Subdomains with Apache’s Virtual Hosts and NetInfo Manager
This is how to create subdomains for testing purposes on localhost. I found a few articles on how do this on Windows (using host files), but nothing for mac. Say for instance you wanted to change your user’s site root to http://username.localhost instead of http://localhost/~username
- Backup
/private/etc/httpd/httpd.confin case something goes wrong. Just duplicate it with a date-stamp or other memorable name. - Open
/private/etc/httpd/httpd.confwith your favorite text editor. - Try seraching for
NameVirtualHost, you should find it around line number 1063. You’ll want to uncomment that line.NameVirtualHost *:80
- There are a few instructions on the following lines. You’ll need something like this in following those instructions.
<VirtualHost *:80>
    ServerName localhost
    DocumentRoot /Library/WebServer/Documents
</VirtualHost>

<VirtualHost *:80>
    ServerName username.localhost
    DocumentRoot /Users/username/Sites
</VirtualHost>
Now you’ll have to edit your configuration in NetInfo Manager so the computer knows where to find your subdomain.
- Open NetInfo Manager: Applications > Utilities > NetInfo Manager.
- Click the lock in the lower left corner, you’ll be prompted for an Administrator password.
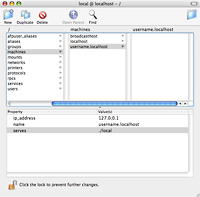
- Click on / and then machines. You should see something there named localhost.
- Click on localhost, then the duplicate icon on the upper left.
- You should then have something called localhost copy. Go ahead and click on localhost copy.
- Double click the name field and give it the name of your subdomain in the Apache config file, i.e. username.localhost. Leave everything else as the default.
- Go ahead and save your changes.
- You should be able to browse to your sub-domain and see your personal website.
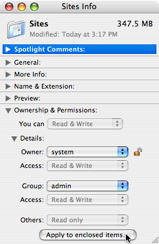
If you get a 403 Forbidden error, you probably need to set the permissions on your sites directory so the world has read access. Get Info on your sites directory, open Ownership and Permissions at the bottom, Others should be Read Only, Apply to enclosed items… and you should be good to go.


